Precision is paramount in hunting and marksmanship. Whether you’re preparing for the upcoming big game hunting seasons or simply refining your skills at the range, achieving a precise zero for your riflescope is essential. In this how-to, we’ll dig into the art of zeroing your riflescope in three shots or less, a skill that combines knowledge of your equipment with a keen understanding of ballistic principles.
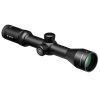
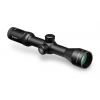
Zeroing a riflescope is not just about aligning crosshairs with bullet impacts; it’s a process that demands attention to detail and a strategic approach. Ryan Muckenhirn, from Vortex, demonstrates this artistry with finesse, utilizing a Vortex Viper HS 2.5-10×44 Riflescope mounted on a Sako Tikka T3x Rifle chambered in 6.5 Creedmoor. His goal is to achieve a precise zero in three shots or fewer.
The process begins with a bore-sighted rifle, laying the groundwork for initial alignment. With a steady hand and a keen eye, Ryan takes his first shot, aiming for the center of the target. Upon inspection, he notes the deviation from the point of aim, observing a slight high-left impact. This initial shot serves as a baseline, providing valuable data for adjustments.
Here’s where the magic unfolds: Ryan utilizes the Dead-Hold BDC reticle equipped in the Viper HS riflescope.
This sophisticated reticle offers sub-tension values, enabling precise adjustments based on bullet impact. By aligning the center of the reticle with the bullet strike, Ryan determines the necessary corrections: four and a half minutes of angle (MOA) down and one MOA right.
As Ryan makes the adjustments, he offers a crucial insight: as the turret moves, the reticle shifts in the opposite direction. This inverse relationship is fundamental to understanding how adjustments translate to on-target results. With a steady hand, Ryan dials in the corrections, ensuring each movement is deliberate and precise.
Upon firing the second shot, Ryan evaluates the impact, noting a slight overcorrection. Undeterred, he recalibrates, making subtle adjustments to fine-tune the zero. This iterative process exemplifies the precision required in zeroing a riflescope, where each shot informs the next, leading towards the desired outcome.
With the third and final shot, Ryan confirms the zero, achieving impeccable precision. In just three shots, he has transformed a mere bore-sighted rifle into a precision instrument, ready to tackle any hunting or shooting scenario. This efficiency is not only practical but also reflects a deep understanding of the rifle-scope interface.
Live Inventory Price Checker
|
Vortex Viper HS 2.5-10x44 Dead-Hold BDC Riflescope VHS-4303 | EuroOptic.com | $ 499.99 |
|
|
VORTEX Viper HS 2.5-10x44mm (30mm) SFP Dead-Hold BDC Riflescope | KYGUNCO | $ 499.99 |
|

|
Vortex Viper HS 2.5-10x44mm Rifle Scope 30mm Tube Second Focal Plane Black Hard Anodized Non-Illuminated Dead-Hold BDC Reticle MOA Adjustment | Optics Planet | $ 699.99 $ 499.00 |
|

|
Vortex Viper HS 2.5-10x44mm SFP BDC-2 MOA Rifle Scope | GunMag Warehouse | $ 699.99 $ 499.99 |
|
Mastering the art of zeroing a riflescope in three shots or less is a great way to make fast corrections in the field. It’s a process that rewards those who approach it with patience and precision. Whether you’re a seasoned marksman or a novice enthusiast, honing this skill elevates your shooting prowess and ensures consistent performance in the field.
Thank you to Vortex Optics and Ryan for demonstrating and highlighting the simplicity and effectiveness of zeroing a riflescope with precision and efficiency. With a firm grasp of your equipment and a methodical approach, achieving a precise zero becomes not just a task but a simple skill in the world of shooting sports. So, next time you head to the range or embark on a hunting adventure, remember the mantra: three shots or less to perfection.
Absolutely correct, but ONLY if you have the shooting basics down. If you are a bad shot, its hard to rely on just a few attempts. For new shooters, I usually suggest a 3-shot group to start to see if there is a pattern, or if they are all over the place. As an example, if their fist shot is a flyer, the rest of the exercise will be a more painful experience. — Cheers!