By Preston Bankson,
Learn from my successes, and my mistakes, as you build a custom reloading bench.
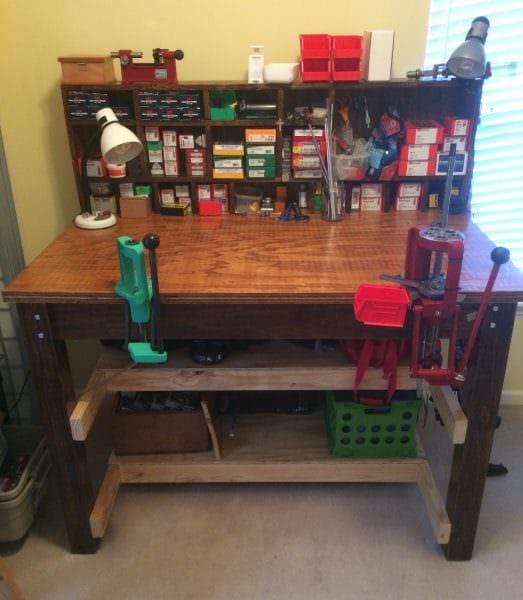

Upfront disclaimer: My bench resides in a spare bedroom. This means my bench features two particular features that I would change were it in a garage:
- I would bolt the bench to the wall
- My wife asked that I make a sincere effort to make the bench “as attractive as possible,” which I accomplished with precise measurements and wood stain.
Bench Do’s
Blueprint the bench – MUST DO
My wife comes from an architecture background and is a real whiz in software programs like AutoCAD, Google SketchUp, etc. In a few hours over drinks she modeled out my bench, and we figured out that some of the structural elements that I was planning wouldn’t work. This saved me time and money by eliminating build errors up front.
If you don’t have access to someone who can model on a computer (or you can’t spare $10 to bribe them with beer) Google SketchUp has a free version, and you can find tutorial videos on the internet. You could also draw a plan by hand and, if you go this route, I encourage you to draw it to scale.
Remember the adage, “measure twice, cut once.”
Go big or go home
My bench top measures 5’ x 3’, and I have yet to need more space than this. My top is as sturdy as can be and cheap too! I used two 8’ x 4’ sheets of ¾ inch plywood and cut them down to 5’ x 3’ and then glued and screwed them together.
Seal, if using wood
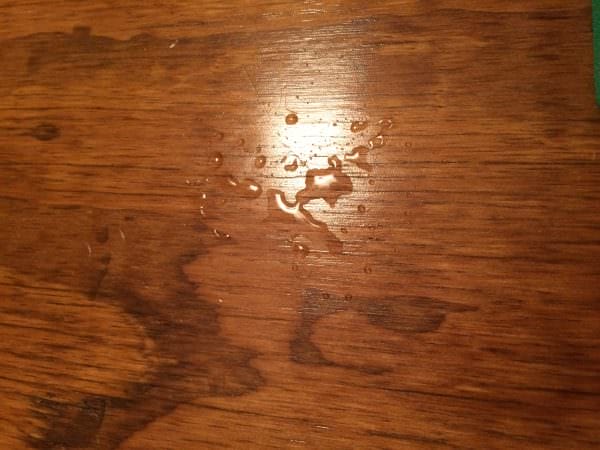
Most benches will be made from wood. Adding even one coat of polyurethane, like Minwax Fast-Drying Polyurethane, to the entire surface of the bench will smooth out the wood, seal it from moisture, and improve the look. For the bench top, I would recommend a few coats of sealant to prolong the life of this wood through years of exposure to solvents, gun oil, etc.
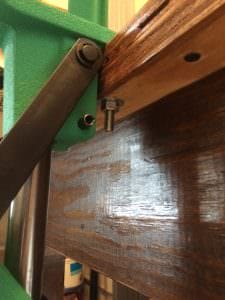
Put on weight – MUST DO
A key finding in my upfront research on bench building was that adding weight from the stuff you decide to store on or in your bench is critical to stability, especially if not bolting to a cinderblock wall or wood studs. In other words, design in places for your heavy gear and supplies.
Think through your press mount
No matter how you are making your bench top and attaching it to your frame, make sure to consider your reloading press mounting. The long story short is that I did not think these measurements through and instead of using three bolts and nuts to attach my single stage press, I had to use two lag screws and only one bolt. I ran a key piece of frame right under where my back two bolts would have gone, so I had to buy long lag screws to firmly secure the press to the bench.
Pro tip: Use liquid nails when mounting your press. This helped attach my lag screws to the wood.
Utilize built-in shelving – MUST DO
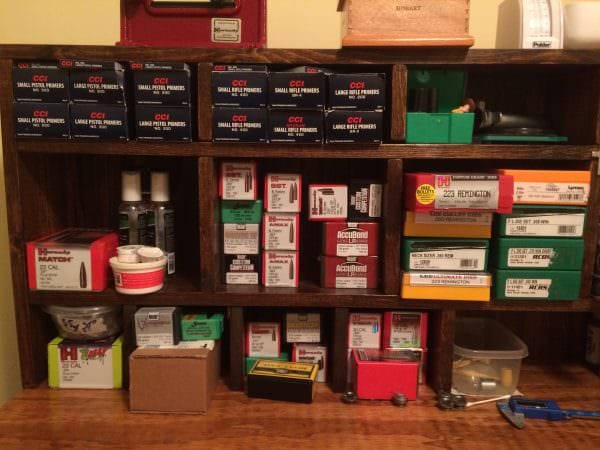
Adding shelving below and/or above the bench top is obviously good for storage and convenience. What I did not appreciate fully before researching my build was the large benefit of additional weight. The items I am storing on my bench weigh more than the bench itself. This additional weight adds rigidity to the frame and prevents flex when using your press.
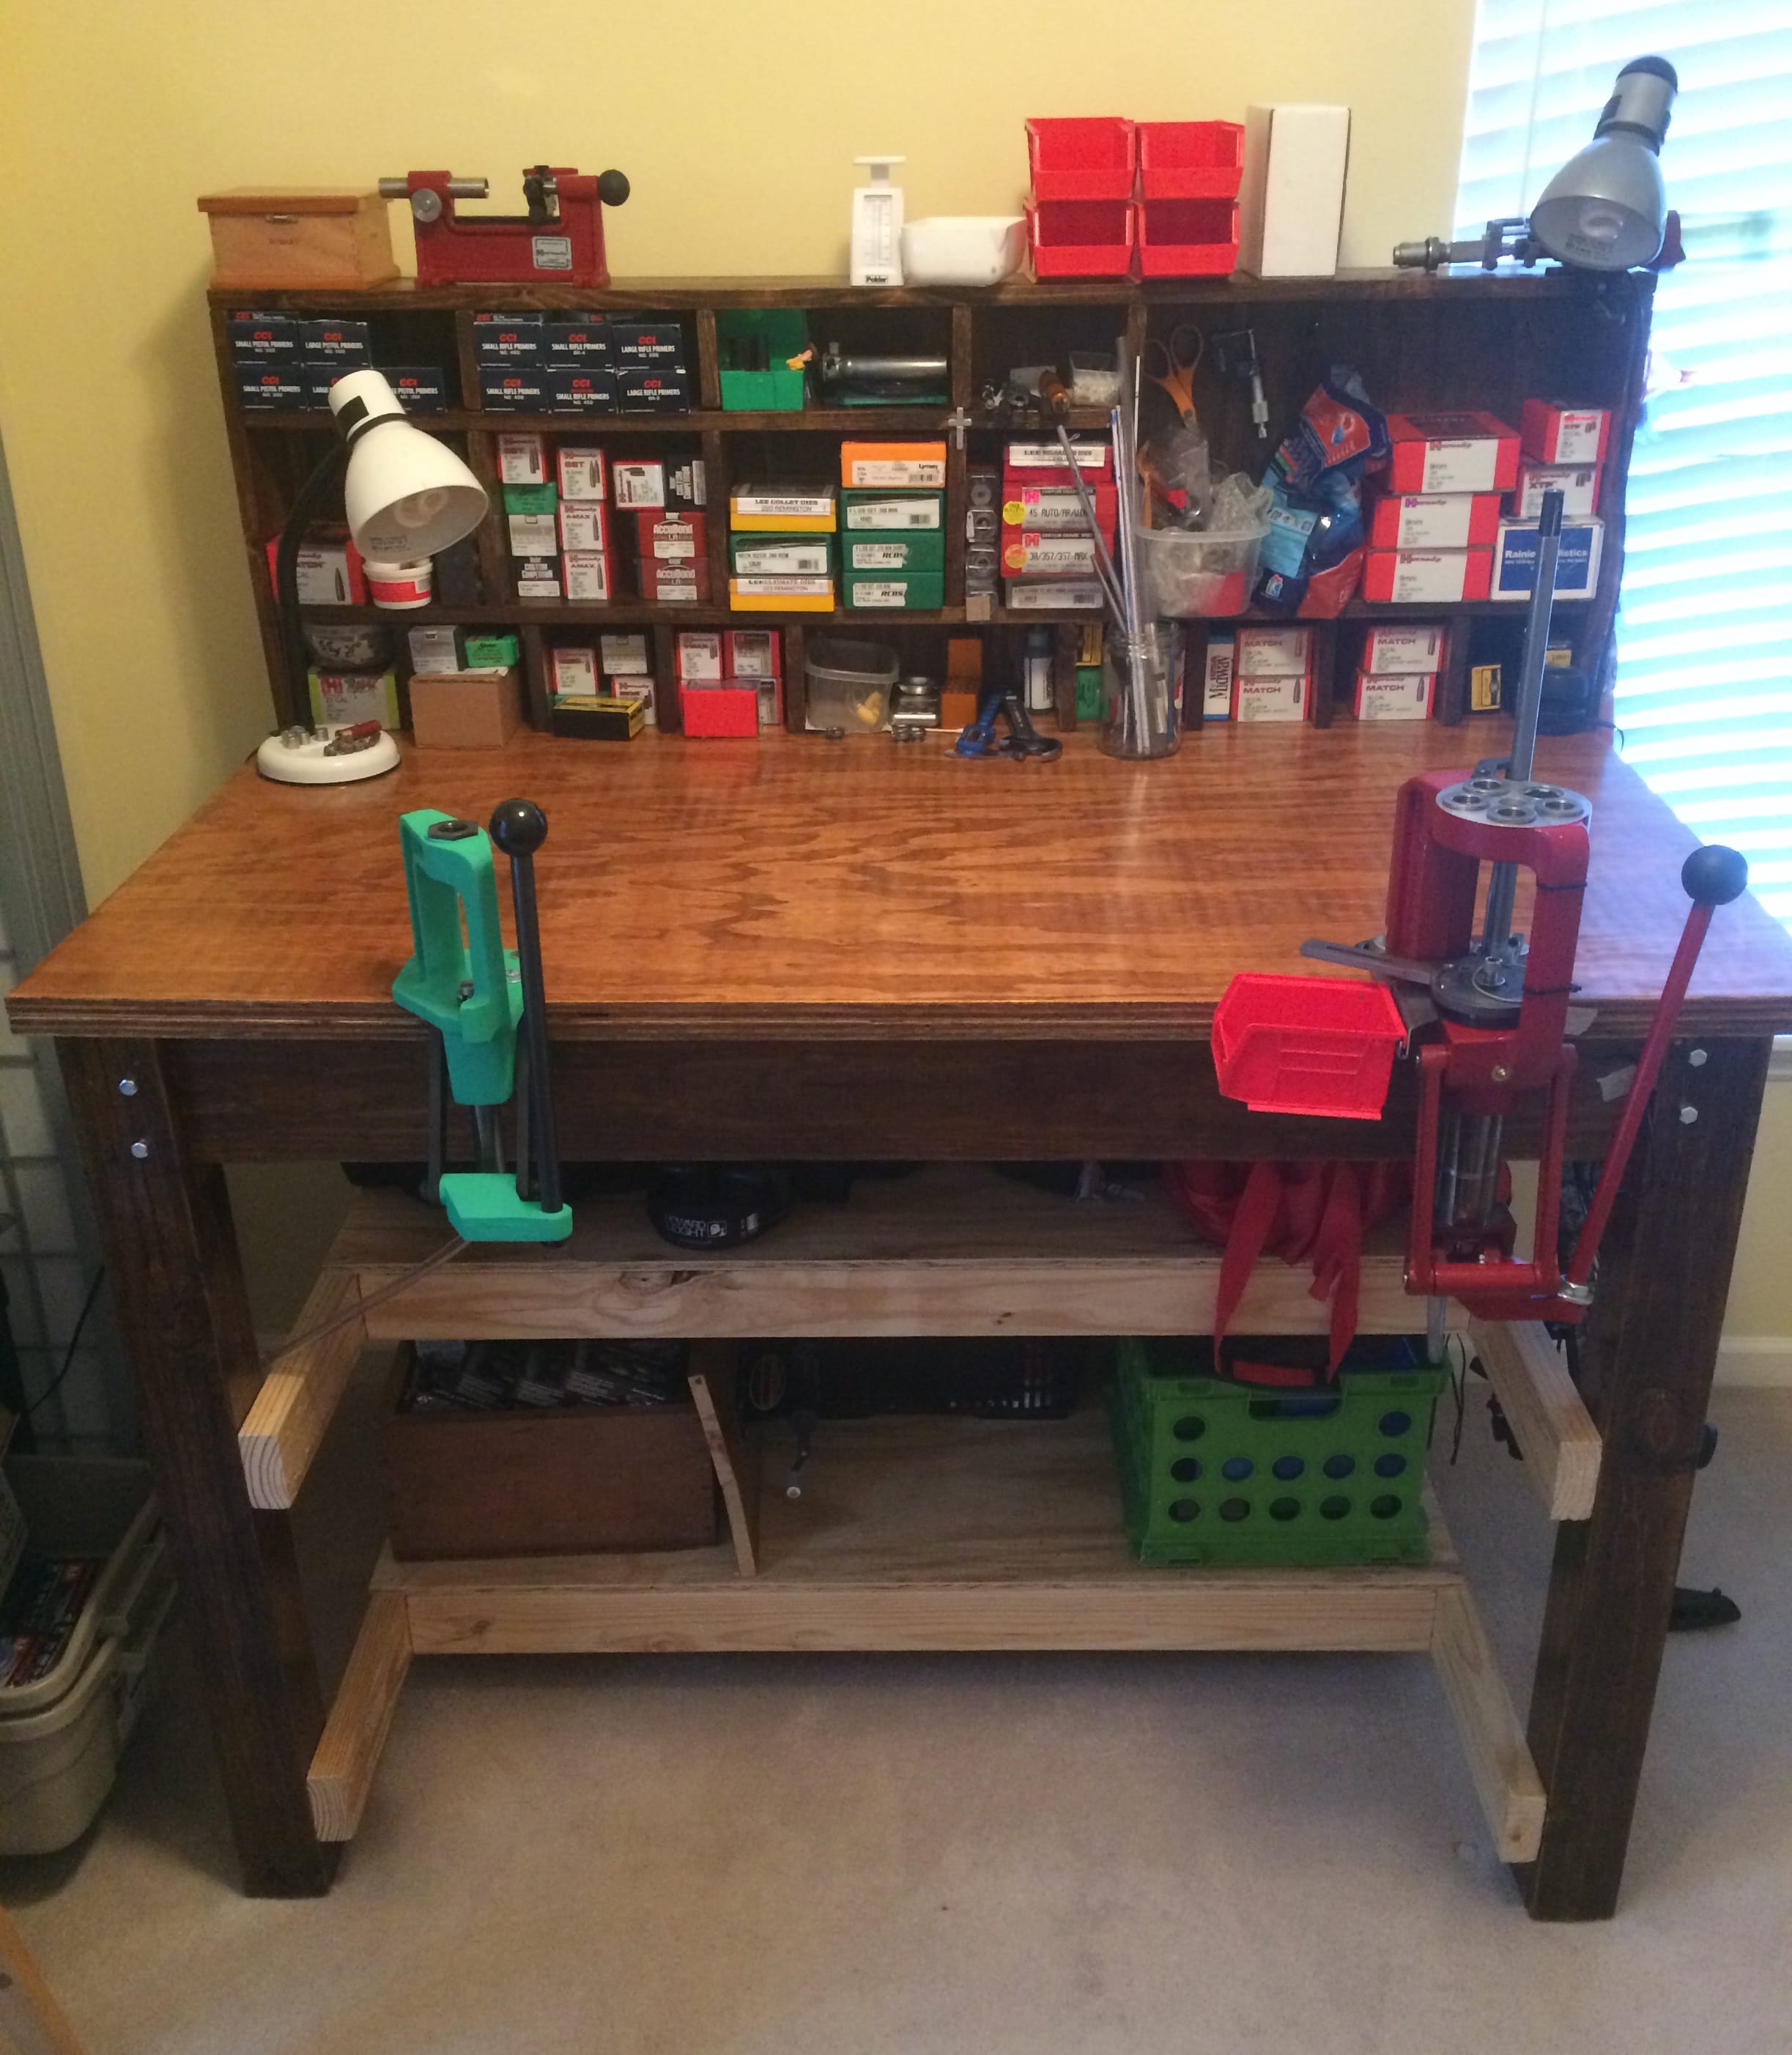
Take time to consider what you will store on the bench and where you want it to be located. It was well worth ten minutes spent measuring bullet boxes, primer boxes, die boxes, etc. and building shelving to best fit my needs. You can see in the picture above that the die boxes and primer boxes slide in perfectly.
Mount to the wall, if possible
This is a simple and cheap way to add rigidity and strength to your workbench. Also, when pulling press handles, the bench won’t tend to pull towards you.
Customize

This is probably the only reloading bench that you build for decades. Take plenty of time up front to think about features that YOU want. I added these features to suit my needs:
- Multi-Level Lip – Allows me to clamp accessories that would not fit on the full 1.5” lip of my bench top
- Stain
- Custom work height – Grab a friend and a tape measure. Stand up, grab your phone, and start typing a text –now pause and have your friend measure from the ground to the lower side of your wrists. This will be roughly the same height measurement as from the ground to your elbow. Whatever height you measure, subtract 3-5 inches and build your bench to that height. I am 6’2”, and I am incapable of expressing how much better it is for me to work on a 42” tall work surface than the 36” height which I had been working on. My young back is already singing praises.
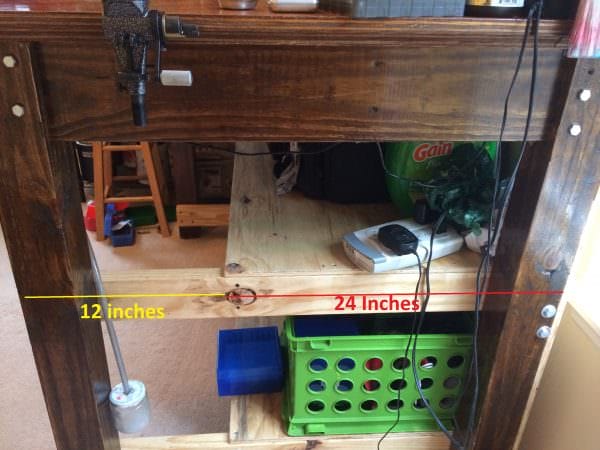
- Recessed lower shelving – This enables me to use a stool and have my knees sit comfortably under the bench top. While the bench is 36” deep, the lower shelving starts at the back and only comes 24” toward the front, leaving a nice 12” open area for my legs. Again, my back is rejoicing.
Bench Don’ts
Overcomplicate the structure
Per some of the above pictures, I utilized a strong, unique frame setup. While this was cool and improved the strength of my bench, it was a headache, required extra tools, creativity, and wood glue when pieces snapped… Building this again, I would have gone with a more simple attachment system between the legs and the upper frame.
Your uses, budget, patience, tools, and skill will determine how crazy your structure will be. I have become more of an advocate for the K.I.S.S. model – Keep it Simple, Stupid.
Stain
While the stain adds personality to my bench, this step added time and effort that could have been spent reloading or, preferably, unloading! If this were not going into the house, I would not have bothered to stain many or any surfaces; however, I would still seal the wood, for the reasons mentioned earlier.
Forget to update your model
If you decide mid-build that a certain change is a good idea, do it! But you MUST go back to your reloading bench plan and ensure that you epiphany will work (have a second party check your math/logic). If it DOES work, then you MUST update your model and delete the old one so that you aren’t referencing old data when you check the model.
See the ALL CAPS above? I may have made this mistake….. twice…. I was not a happy camper either time.
Forget to check your model often
Similar to what I just mentioned, I recommend having a physical copy of your bench plans with you while building. If you cannot or choose not to do this, at minimum check the plans regularly during the build to ensure you are on track and know your next measurements.
There you have it, the Dos and Don’ts of building a reloading workbench. Take your time and enjoy! Most reloaders are tinkerers by nature. Consider this a fun project for the next few months and get into it. As with most things in life, you get out of it what you put into it.
Some reloading Bench Premade Plans:
- https://accurateshooter.net/Blog/benchnrma.pdf
- https://www.americanrifleman.org/Webcontent/pdf/2009-6/200961885713-build_bench.pdf
- https://www.pinterest.com/pin/222154194097083995/
- https://www.somerssportsmen.com/bench.pdf
- https://www.zjstech.net/gunstuff/reloadbench.html

Preston Bankson is grateful to be a byproduct of upbringing by a hunting family and marriage to a shooting family. While he primarily hunts in his home state of South Carolina, he enjoys the occasional excursion to a waterfowl flyway or trip out West for deer. Since the introduction to his in-laws, Preston has educated himself on concealed carry and become an avid reloader. He enjoys perfecting reloading techniques which have produced big results in his hunting. When not pulling the trigger himself, Preston enjoys introducing these pastimes to others and dabbles in shooting competitions.



Preston, really like this reloading bench. Looking to build a bigger more sturdy one and this is one of the best designs I’ve seen so far. Do you have the blue prints or could you email several pictures of the sides/back?
Thanks
Harrison
Hey Preston,
Currently drawing up plans for my bench and cheating off of you a little. How did you attach the carriage bolts at the joints in your bench?
Hey Josh,
They are actually lag screws, not carriage bolts, and were screwed into the leg first and were long enough to go pretty much all of the way through the horizontal brace behind the leg.
Flip me an email at [email protected] and I can send a photo or two that may help you visualize.
-Preston
Awesome layout, love the lower recess for leg room. Great use of space & multiple heavy duty shelves. I do have a suggestion. If you were to put plywood on the sides like you did across the back it would eliminate any rock you may get when working the handles. You would need to have cross braces flush with the outside of your legs to secure the plywood to so it would have nowhere to flex thus giving maximum strength if glued.
I am just getting started in reloading. Having inherited several dies and misc stuff, before I invest in a turret press I want to build the bench. Reading through the article and comments gave me a good heads up to what I need but general details would help. I am planning a 96″ x 36″ bench with drawer storage under and 12″ deep cabinet on back of bench. Planning on 42″ height with legroom for stools. Question… when planning turret, tumbler, and shotgun presses along with related space requirements for the operation…. what is a comfortable space to work? How… Read more »
Hey Charles, The bench in the photo at the top of the page has 28″ of bench space between the presses. I use this open space for a number of things but if I didn’t need it for working space and was trying to rather efficiently, yet comfortably put presses in a row, I think ~10″ of bench space between each press is reasonable. It’d give you some space to put a box of bullets or tray of cases on the bench to quickly get them to the press. I think 12″ between each press would be plenty of room… Read more »
And, assuming you are right handed, it is more imporant to have 12″ or so of space to the left of your press than the right of your press as you will be cycling press with right hand and grabbing components constantly from the left side of the press.
Good looking bench. Very well organized. I will probably borrow a lot of your ideas. Moved recently and finally have my own private room for reloading room. And to all of you that gave comments I picked up some good ideas from you also. Good shooting to you all.
Great Article. I’m getting ready to move and must build a new reloading bench. Like you it will be in a bedroom instead of my workshop so it needs to look nice. I’ve been reloading since ’72 and have accumulated quite a few items so organization is important. Two things I have done is mounted my Rockchucker on a piece of 6″ X 10″ X 3/8″ steel plate sandwiched between the press and bench. This helps distribute the force when resizing over a wider area of the bench. Also, living in the humid south, I keep my primers in a… Read more »
Was wondering if you had a copy of your blue prints for this bench and if you’d be willing to share them.
Aaron,
I’d be more than happy to share! My ‘blueprint’ is a sketchup file. Email me at [email protected] and I’ll send it over your way. Not sure if you will be able to access the file via the free trial download but it’s worth a shot.
-PB
I originally had shelves under my bench and had to kneel to get at the stuff on the bottom. While in lowes I found heavy duty drawer slides, I used the original shelfs and built two drawers that slide in and out with one hand. Even with a few thousand bullets they open easily as the sliders are rated for 75lb.
Greg,
That sounds fantastic. I wanted to build in drawers but didn’t make it work and moved on. Would you mind sending a link to the sliders that you used or something similar? Also, how did you build the drawers ? Sorry for questions but I am probably going to copy you when I get bored one dark winter afternoon!
Thanks,
Preston
Good article – shows there are many ways to solve the problem. I copied my bench from a friend’s design, making the top from three 2x10s secured with 2x4s as cross braces. It only measures 28”x48” and has removable legs to accommodate repeated moves while in the military. I have been loading on it for 24 years now, and I have more room now so will be building a bigger bench to put more presses on.
Hey, Preston, I have an ongoing reload enigma. I am trying to get the same performance from my 6.5 x 55 Swedish rounds as I do from my 6.5 x 47 Lapua rounds. Here is the recipe: 140 grain Berger Match Grade VLD for both; 39 grains of H4350 for both. Winchester primers (large rifle for Swed. small rifle for Lapua); and new unmodified brass for each. I try to keep the recipes close together for the sake of proper comparison. With those recipes the Swed is under powered, and the Lapua is also a little under powered. I am… Read more »
Hey Wild Bill, As I understand, case “shape” does not make much of a difference; however case “capacity” does! Given your example above, using the same projectile and powder, the Swede should hold notably more powder (larger capacity). I think you would have a better “experiment” if you loaded, say 95% of each max load to compare the two, rather than pegging a grain weight. While I know you would never compare these, I’ll give the extreme example of 300 Blackout vs .30-06 using the same bullet and powder in each case. Pegging a safe % of max load would… Read more »
@Preston, I never would have thought of it! If I can just get the Swede to catch up, I’d be tickled. Thank you.
MUST NOT DO – allow lead residue associated with reloading to be part of ANY bedroom, period, end of story.
I had a book called the Shooters Workbench, by John Mosher. He has, well though out plans for several reloading benches, plus a lot of other shooting accessories, in the book. Most of his designs are modular and can be disassembled in case you ever move and want to move the bench. They are also heavy enough to use a reloading press without rocking the bench and they don’t have to be mounted to a wall. Well worth the money just to get the reloading bench plans, if you’re planning to build a reloading bench. I wish I could find… Read more »
Thanks for the info, Sam! I had not come across this book and now know to give it a read before I undertake my next project.
Best,
Preston
Great bench & idea of weight to stabilize table but the cheapest bench I’ve built was using two solid 3×6 ‘ doors and a 3”x6” beam I notched that served as an anchor for the 2”x10”shelve that held the powder measure & scales and 8 lb powder jugs above and to store bullets below…. This whole bench cost less than $60 and is impossible to tip over . Yes , thoughtful pre-planning can pay great dividends when reloading hundreds of rounds . I cast and size thousands of bullets and need all the room provided by this 3’x6’ bench…. but… Read more »
I think using Liquid Nail to help mount your Press is gonna come back and bite you! If you ever want to install another or think that your location just doesn’t work, it’s going to be difficult to move that to a different location. Mine is a small bench, only 7 ft. long and 48 ” deep. Have 2 presses and 2 powder measures mounted currently with 2 shelves under and 1/2 of the back with pegboard backing. Upper shelf goes all the way across. Wish I had a better storage solution for bullets as the slide out container I… Read more »
Torn,
Fair point! I hope not to have to find out for quite some time.
A slide out for bullets does sound labor intensive. I hope you can manage some other storage for them before you have to see a chiropractor!
That is a terrific article! I made mine from scrap from building our log home (Satterwhite Lone Star model), but I am in the garage. The cookbook and culinary library, sewing room, that weird exercise with the ball room, and crafts room are in the house. I built the bench at standing height because I think better on my feet. I reinforced the bench top where the presses are located, and even thought to lag the bench to the studs. Tools at the back of the bench on a pegboard. Calipers, concentricity measure, tumbler, brass trimmer, and dies at the… Read more »
I appreciate you encouragement, Wild Bill!
I also have a “miscellaneous” bench to my 180. It serves the exact same purposes that you listed above!
Mine is 24’x48 in., and 36″ tall, metal gusset reinforced legs and a mesh rubber top over plywood. It helps grab the primers if I drop one. Also I boxed in the lower part instead of shelves above because of space limitations. I like yours, it is fit to be in your wife’s house, haha.
Jerry, I had never thought to have a rubber layer on top but I definitely see it’s viability.
Thanks for the comment! And I didn’t want to take any chance of it not qualifying for the house!
Cheers,
Preston
Nice looking bench but took small for my reloading needs. I have way too many presses bolted to my bench five in total. I’m thinking about removing an Dillon press that is set up for 10 mm cartridge and let the Square Deal press handle the 10mm cartridge reloading from now on. The decision is made from looking at your clean bench top, time to cut back a press to save some room. It is hard to put away something your first progressive press, big money when I got twenty plus years ago. Dillon 450 junior B press.
Rudolph,
I have never seen the 450 Junior B. Sounds like a somber day but a forward thinking one. I hope your future loading endeavors go well!
Best,
Preston
I store primer and powders separate in coolers to handle the hot summer
It is a good idea to NOT store powder, primers or bullets at or on your loading bench. Using a nearby metal locking cabinet is safer since you won’t accidentally get the wrong powder in the powder measure or the pistol primer in your magnum rifle. One sheet of cabinet grade 3/4″ plywood and a sheet of 3/4″ AC exterior grade for the stiffener. The C surface glued to te cabinet grade. Make the top 40 or even 48 inches deep and as long as you have space.. Put an edge molding on the top level on the front edge… Read more »
Jim,
Great thoughts! I only ever let one powder and primer type on my bench surface at a time and have yet to have an issue. The LED lights would be a nice addition to any bench. Finally, not mentioned above I did put leveling legs in my four posts – haven’t had to adjust them yet but I know they will come in handy one day.
Best,
Preston
I have an old door across two filing cabinets. works great because I have no need to make it pretty. One thing that I do NOT do is store as many primers together as I see in the photo. I store powder and primers away from the work area just in case of a KB.
@Dr. S, What’s a KB? KaBoom?!
Dr. Strangelove,
I continue to be amazed at the helpfulness in the reloading/shooting community! That is a good idea and I have just moved a few cases into a nearby closet to mitigate the risk.
Thank YOU,
Preston
Lacking a basement in my current house, I built my bench to fit a niche in the garage – it’s 22″ deep and 11’6″ long. Mostly built of 2″ thick lumber (various widths). There’s also a layer of 3/4″ plywood screwed on top, sealed with clear Minwax finish. Legs are 4x4s, cut to slightly different lengths so the top is perfectly level despite the deliberate small drainage slope of the garage floor. I put the bench together with 5/8″ carriage bolts – NO glue! – so if I ever wanted to move it, disassembly would be easy. It’s very, VERY… Read more »
Hank,
Like me, you made the best of YOUR situation. Simple, clean, and fit to your dimensions. I would do the same in your situation.
Best,
Preston
Nice looking bench.
Size is relative to what one is trying to do. I have 16 running feet of 32 inch wide bench top 5 rifle and pistol presses 4 shotgun presses load for 50 plus calibers.
I should have built bigger. Benches are a lot like storage sheds bigger then one thinks is better.