Tom McHale schools us on the proper use of quick turrets and scope reticles when shooting for long distances in this continuation of his article series on long-range shooting.
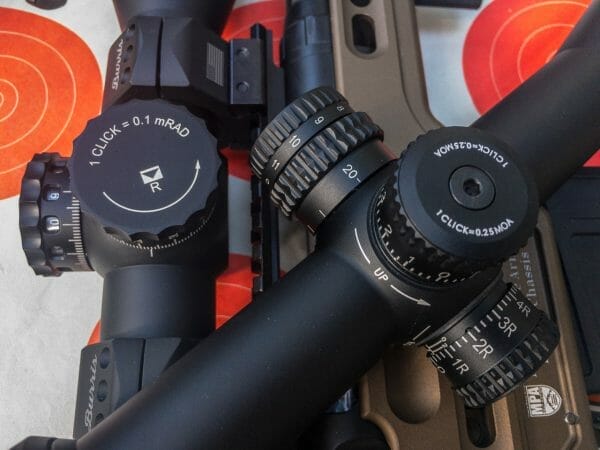

USA –-(Ammoland.com)- Turrets and reticles generally compliment each other, although sometimes they can perform the same function. On old-school rifles, one commonly used the turrets for initial zeroing and the reticle for shooting. As the “turrets” were capped and required a screwdriver or coin to make adjustments, they weren’t conducive to on the fly adjustments in the field. The idea was that you would do a one-time set to get the rifle shooting to where the crosshairs were indicating at a certain distance. Later, shooting in the field, the user would rely on holdover to account for longer distances.
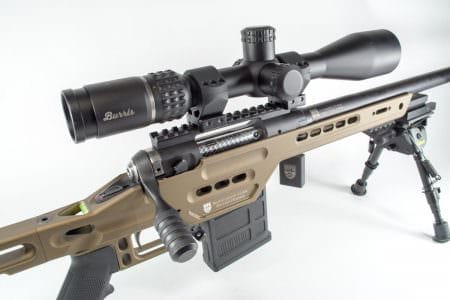
Before we get into nuances and differences of turret and reticle combinations, we can limit the scope of turret types. Since this is a series about long-range shooting, we’ll stick to “target” or “tactical” turrets. Those differ from more traditional capped turrets that are designed primarily for initial zeroing of a rifle. Here, we’ll focus on turrets that remain exposed and are intended to be used in the field on a shot-to-shot basis to adjust for elevation, windage, and target movement. These taller drums aren’t just big and bulky to look cool – they show you the adjustment markings so you can adjust for each different shot requirement.
There are numerous concepts to consider when making an optics decision when it comes to turrets and reticles, so let’s try to hit some of the biggies.
Oh, one more note before we start. To keep this article less than “one billion” words, we’re going to skip differences between first and second focal plane scopes when talking about reticle holdovers. We’ll be covering that topic separately next month.
Mismatched Turret and Reticle Graduations
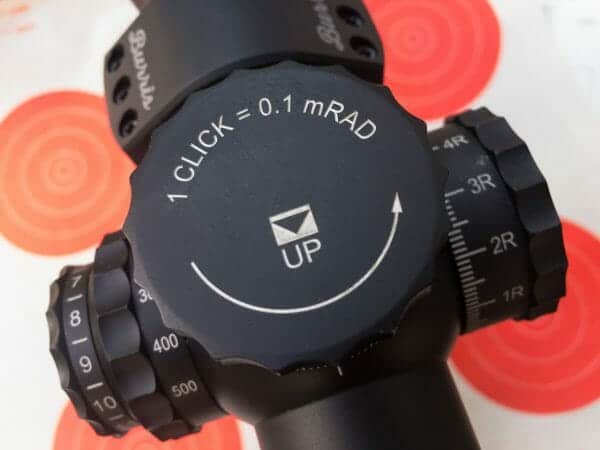
On far too many scopes (in my opinion) you’ll find a reticle graduated in milliradians combined with turrets that adjust in minutes of angle. Sure, they both do the same thing, but it gets confusing. A milliradian represents 3.6 inches at 100 yards while a minute of angle corresponds to 1.04 inches at the same distance. To put that practical terms, if you choose to make a shot adjustment through the reticle of one milliradian, there’s no “exact” way to do the same adjustment with the turrets unless you resort to (brace yourself)… math! Maybe companies do this for economies of scale so they can manufacture one scope body and offer it will all sorts of MOA, mil, and ballistic compensation reticles.
Whatever the reason, it drives me nuts. It’s kind of like having car speedometers marked in miles per hour with highway speed limit signs that only show the metric numbers.
The benefit of using the same units of adjustment on the reticle and turret is simplicity. You can make the same shot adjustment using either a reticle holdover or a turret adjustment. That’s especially handy when you use both to make a shot. For example, you might adjust the elevation turret for drop and use the reticle to account for wind drift. You’re always working with the same units of measurement, and that’s a good thing.
Most minute of angle scopes feature .25 MOA per click adjustments. That represents a smidgen over a quarter of an inch at 100 yards. Most mil-dot scopes use .1 milliradian per click adjustments. That’s about .36 inches per click at 100 yards.
Standard Mil-Dot and MOA Reticles
Here comes my institutional bias. There, I warned you.
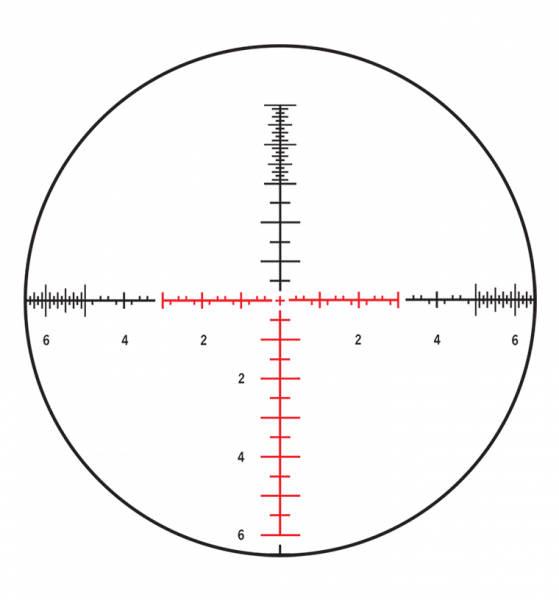
There are infinity trillion reticle designs on the market, and at least half of those are cool and useful. To me, the most practical are those that offer straightforward mil or minute of angle increments. The reasons will become more evident as we talk about ballistic compensation reticles next, but in short, I like the flexibility of mapping my own bullet trajectories to a standardized scale. If the reticle shows a constant array of minutes or mils with fractional indicators between them, you don’t have to remember obscure reticle designs like “OK, so the second and third lines below the crosshair are 6.3 minutes of angle apart according to the manual,” or “that circular thing is 4.2 mils wide…”
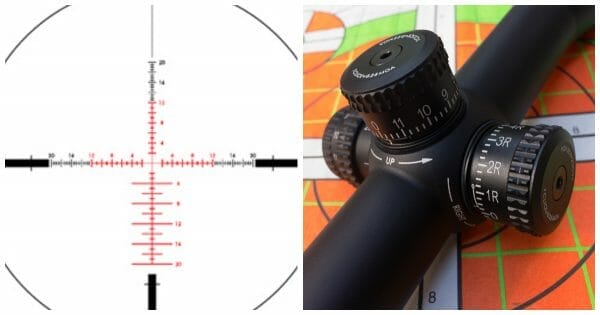
One added benefit is that a traditional mil or minute of angle reticle can move from rifle to rifle and caliber to caliber with ease. Not being “hardcoded” to the trajectory of a single round, you can do whatever you like with it.
Give me two “rulers” in a cross pattern any day, so I can easily see each mil or minute of angle adjustment in whole and fractional increments. Since a picture is worth a thousand words, I’ve included one here. These reticles, in almost any style, make me happy.
Ballistic Compensation Reticles
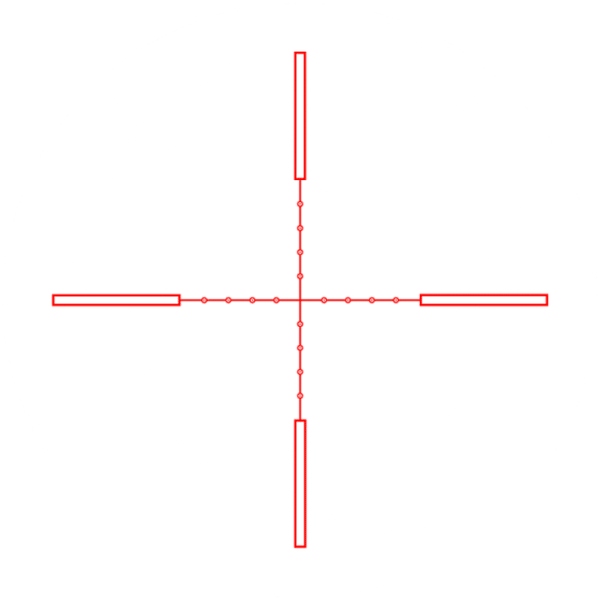
Most optics companies offer reticles that have markings which correspond to the trajectory of individual cartridges. For example, since the trajectories of standard .223 Remington and .308 Winchester rounds happen to be so similar, you might run across scopes that have markings for specific yardages in the reticle itself for those calibers. These work fine as long as you stick to standard ammunition and conditions.
The drawback is a loss of precision. As we’ll see when we build a long range shooter’s databook later in this series, for every combination of rifle, ammo, and weather conditions, the trajectory is different. Ballistic compensation reticles get you close, but by definition, they can never be as precise as mapping your own rifle and ammo combination at each desired distance. Also, a change in temperature and pressure will throw off BDC reticles even more.
If your goal is to get “close enough” then BDC reticles are great. They’re simple to use and fast to get on target. If you need maximum precision, then go with standard reticle graduations and make your own distance/adjustment map based on actual performance.
Custom Turrets
Some manufacturers offer custom turret marking services. Here’s how that works.
You gather and submit specific information about your gun, scope, ammunition, and normal shooting conditions. This includes inputs like sight height above the bore, bullet ballistic coefficient, actual velocity from your rifle, zero distance and average temperature, pressure, humidity, and altitude in your area. The manufacturer uses that information to calculate the ballistic trajectory of your round and makes a reticle marked with yardage distances. So, to adjust for a 600-yard shot, just spin the dial to 600 yards and, in theory, you’ll be close to dead on.
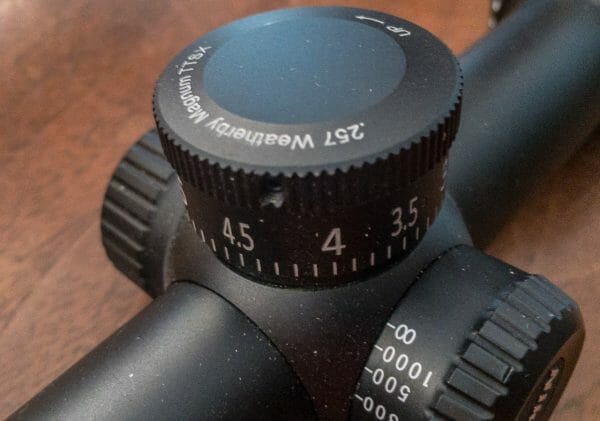
I’ve tested a couple of these, and they work well for applications where you’ll stick with the same rifle and ammo and where you’ll be shooting in similar altitude and temperature conditions. If you travel to places where conditions differ, then you’ll be off.
Which to Use? Turrets or Reticles?
Depending on your optic, there may be some redundancy between the turret and the reticle. While traditional hunting scopes may have a single crosshair, your long-range ready optics will likely have a complex set of windage and elevation graduations.
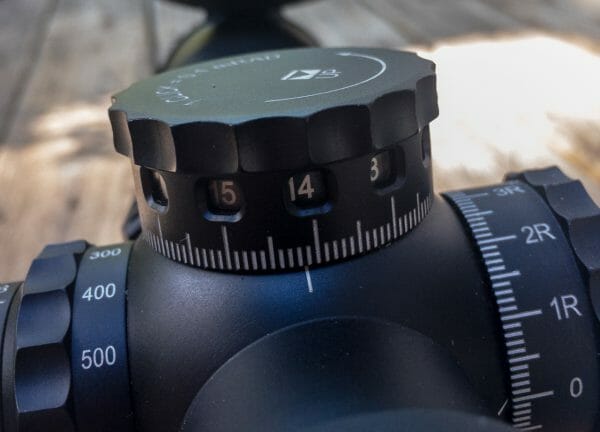
Part of the decision as to whether to hold over with the reticle or use turret adjustments depends on how much time you have. If you have time before a shot, using the turrets for elevation adjustments to account for bullet drop and the reticle to account for windage and moving targets is a great approach. That allows you to forget about the drop and focus on reading the wind or establishing the correct windage lead adjustment. The related benefit is that wind changes rapidly, so by the time you make a windage turret adjustment, you might have to do it all over again.
So, What to Buy?
If you want flexibility and precision, stick with a graduated reticle with standard and consistent milliradian or minute of angle marks. For simplicity, make sure that the reticle pattern matches the click adjustments – mil to mil and MOA to MOA. Which system is entirely a matter of personal preference, as is the complexity of the reticle. Some, like the Horus TReMoR3 reticle, look amazingly complicated, but they’re not as intimidating as they appear. The purpose of such reticles with an upside down Christmas tree of marks is merely a visual tool that allows fast holdover adjustment for both windage and elevation at the same time. It’s all about options.
About
Tom McHale is the author of the Practical Guides book series that guides new and experienced shooters alike in a fun, approachable, and practical way. His books are available in print and eBook format on Amazon. You can also find him on Facebook, Twitter, Instagram, and Pinterest.



Either way you will have to verify how a particular rifle shoots with a particular cartridge. Small bore calibers out to 300 yards have somewhat negligible differences. Even with MPBR you will want to see how each rifle and cartridge performs. Long range is a whole different world where you should use FFP Scopes and custom rifles with reloads for precision. At that point it’s all about quality equipment.Also ballistic apps,spotting scope,spotter,quality rangefinder, advanced external ballistics knowledge,atmospheric conditions, charts,etc. Good article for basics though.
It’s funny, he’s been gone just a year now, and as I get older, I realize how much of what he passed down to me gets more and more useful as the time goes by. 30
…and that, one and all, is how the target got away. Give me; a nicely tuned rifle with a free floating barrel in a caliber of 7mm or better, (don’t need no stinkin’ magnum), a rock solid mounted scope with a second focal plane 4A reticle that zooms up to no more than 10X, a steady rest, and I’ll just call hurestic elevation by using the bottom post…unless you practice and record and learn from the results of intermediate (400M) to (800M) long range, live fire, shooting every single day, no one, especially myself, will ever be a good enough… Read more »
@Mike, I tend to use the heuristic technique myself. And I send my thanks and gratitude to your old daddy, too.
I couldn’t have said it better. Also, I wonder how many long range guys can hit a 6” circle at 200 yards 50% of the time
offhand? Lol